Puff Ink For Screen Printing can turn a flat design into raised lettering that catches both light and fingertips. The result depends on more than the ink itself. Fabric type, mesh count, deposit thickness, curing temperature, and press setup all affect how high the print rises and how well it holds its shape.
A practical choice starts with the garment. A soft cotton tee may puff differently from a polyester blend, even when the same ink and settings are used. Check the manufacturer’s technical data sheet, then test a small print on the actual fabric. Feel the cured surface. Look for uneven bubbles, flattened edges, or a stiff hand. Small samples can prevent a large, disappointing run.
There is no expert quotation or source material in the request, so I won’t invent a named specialist’s words. That matters: reliable advice should be traceable, not merely sound authoritative. The seven tips ahead cover ink formulation, garment compatibility, screen selection, print deposit, curing, wash performance, and supplier support. Each choice involves trade-offs. A taller puff may look striking, but excessive heat or an overly heavy deposit can distort fine details. And a test print is not a guarantee; production conditions can shift. Check twice.
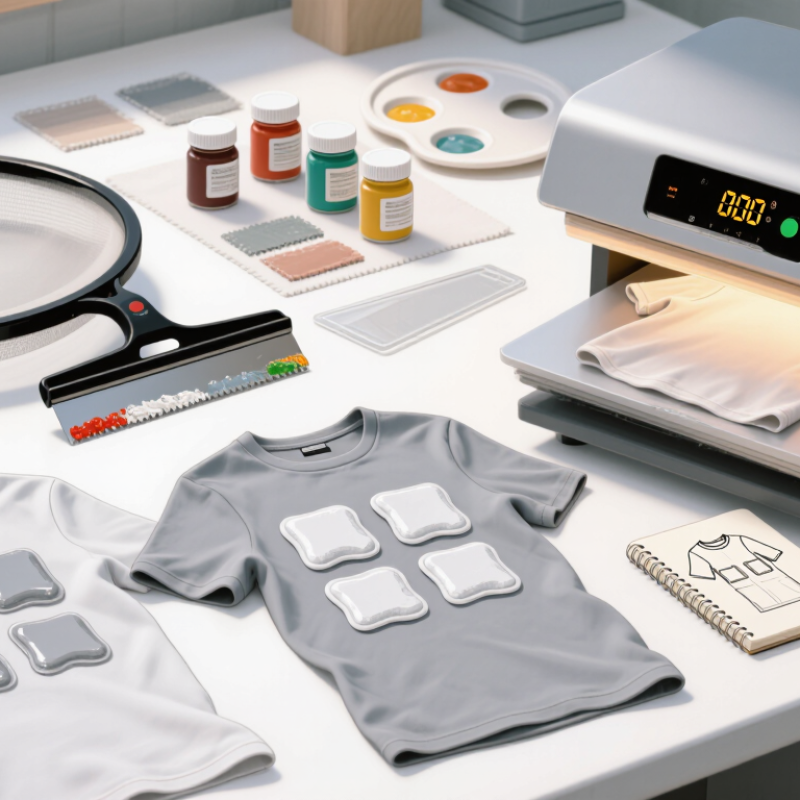
Puff ink expands when heat activates its blowing agents, creating a raised, textured surface. The change happens during curing, not simply as the ink dries. As the printed layer warms, tiny gas pockets form and grow inside it. The ink’s binder then sets around those pockets, holding the expanded shape in place.
The result depends on more than the heat setting. Ink deposit, garment fabric, and time under heat all affect the final height and feel. A thick deposit may puff dramatically, but it can lose fine details or feel stiff. Too little heat can leave the print flat or tacky; excessive heat may scorch fabric or make the texture brittle. Small test prints help. Record the dryer temperature, belt speed, and ink deposit, then check the print after it cools. Measure the ink layer at the garment, not just the dryer’s display. That reading can be misleading. I’ve found that a design that looks evenly raised while warm may settle unevenly once cool, especially across seams or textured fabric. Adjust one variable at a time, and let the print fully cool before judging its height and softness.
| Tip | What to Check | Why It Matters | Practical Guidance |
|---|---|---|---|
| 1. Match the ink to the fabric | Fabric fiber, surface texture, color, and stretch | Adhesion and expansion can vary with the substrate. A result that works on cotton may not behave the same on a synthetic or blended fabric. | Check the ink’s technical data sheet for compatible materials, then test on the actual garment before production. |
| 2. Understand the curing window | Recommended ink-film temperature and dwell time | Puff develops as the ink film heats and expands. Insufficient or uneven heat can leave the print under-expanded or poorly cured. | Follow the supplier’s specified curing conditions and verify the ink-film temperature with an appropriate probe or temperature strip. |
| 3. Choose the desired puff height | Expansion level, texture, and detail requirements | Greater expansion can create a more pronounced raised effect, but may soften fine lines and small details. | Make test prints at the intended screen mesh and ink deposit, then select a height that preserves the artwork’s legibility. |
| 4. Consider screen mesh and stencil | Mesh count, stencil thickness, and open design areas | The screen controls how much ink is deposited, which influences the final raised profile and print definition. | Use the ink maker’s recommendations as a starting point. Test mesh and stencil choices together rather than changing several settings at once. |
| 5. Review print and flash requirements | Number of passes, flash temperature, and time between layers | Excessive heat between layers can affect print buildup and subsequent expansion, while an inadequate deposit may produce a low profile. | Keep flash settings consistent, avoid overheating the print, and evaluate the complete print sequence on sample garments. |
| 6. Check wash and wear performance | Adhesion, cracking, abrasion, and laundering results | A raised print must remain attached and retain acceptable appearance during normal use and care. | Allow prints to cure as directed, then test samples using the garment’s care instructions and relevant quality-control procedures. |
| 7. Run a production-scale test | Equipment consistency, garment variation, and repeatability | Press speed, heat distribution, garment thickness, and other production conditions can change the curing result. | Record the tested settings and inspect samples from different positions in the production run before approving full-scale printing. |
Puff ink should match the fabric’s stretch, surface, and intended use—not just the artwork. Textile Exchange’s Materials Market Report 2024 estimates that global fiber production reached 124 million tonnes in 2023, with polyester accounting for about 57% and cotton about 20%. That mix matters: cotton usually offers a stable surface, while polyester blends may need careful temperature control to limit dye migration. For stretchy jersey, choose an ink system designed to move with the fabric; a raised print that cracks after one wash is not a useful win. Test the exact garment, not a similar swatch.
Think about how the garment will be worn and cared for. A bold puff graphic on a relaxed cotton hoodie can tolerate more texture than a fine design on lightweight performance wear. Heavy deposits may feel stiff, and high curing heat can affect delicate or heat-sensitive fabrics. Check the ink supplier’s technical data sheet for cure temperature, deposit guidance, and wash-care recommendations, then confirm results with a production test. Look closely at the print after stretching and laundering. Small differences in fabric finish can change the outcome. I have seen “same fabric” batches behave differently; it is annoying, but worth allowing for. Keep a record of mesh, stencil, flash time, and final cure so the next run is less guesswork.
Choosing puff ink starts with the formula, not the color chart. Water-based formulas can feel softer, while plastisol-based options often offer strong opacity on dark fabric. Check the product instructions for mesh count, curing temperature, and compatible materials. These details vary. A cotton shirt and a stretchy blend may react differently under the same heat.
Color also changes how the print reads. Pale ink on dark fabric may need an opaque underbase, while bright shades can shift after curing. Test a small swatch on the actual garment. Let it cool, then inspect it in daylight. A color that looks vivid under shop lights may appear dull outdoors. Annoying, but useful to know before a full run.
Texture depends on ink volume, screen setup, and heat. A thicker deposit can create a taller rise, but too much ink may produce uneven bubbles or a stiff patch. Keep the first test modest. Cure it as directed, then stretch the fabric gently and check whether the raised surface cracks or flattens. Record the settings that worked. Still, notes are not a guarantee; humidity and fabric finish can change the result. That uncertainty is part of choosing well.
Before choosing puff ink, compare its technical data sheet with the dryer’s actual capabilities. Check the recommended mesh count, deposit thickness, flash temperature, and full-cure conditions. Puff additives expand only when heated correctly; too little heat can leave the print weak, while excessive heat may flatten the raised surface. Measure the ink film itself with a temperature probe or temperature-indicating strips. A dryer’s display shows chamber conditions, not necessarily the temperature reached by ink on a moving garment. Test the intended fabric, too. Cotton and polyester can behave differently under heat.
Build a small test run into your setup. Record belt speed, garment position, and measured ink-film temperature, then inspect prints after cooling and washing. For adhesion checks, ASTM D3359 uses a 0B-to-5B rating scale, with 5B indicating the strongest rating in its cross-cut method. This is a useful reference, not proof that puff ink has expanded or cured properly; evaluate texture and wash performance separately. Check wash durability using a consistent method, such as AATCC TM61, and follow the test method’s stated conditions. Small details matter. I’ve seen a print look convincingly raised straight off the dryer, then lose definition after washing. That’s why a quick visual check alone can be misleading.
Use these seven checks when comparing puff inks. Scores are a practical planning aid, not laboratory measurements or universal product ratings. Always follow the ink’s technical data sheet for mesh, deposit, flash, and curing conditions, and verify cure and puff performance on the intended fabric before production.
When choosing puff ink, test it on the same fabric you plan to print. Cotton, blends, and dark garments can produce different results. Start with a small screen and a simple shape, such as a filled circle. Check whether the ink rises evenly or leaves thin, flat patches. Keep a note of mesh count, squeegee pressure, and print strokes; small changes matter. A sample first.
Judge the surface after curing, not while it is still warm. Follow the ink maker’s curing guidance, and verify the print has reached the required temperature throughout. Compare a light deposit with a heavier one. Too much ink may create a stiff, uneven surface, while too little can barely puff. Let the sample cool fully, then feel it with your fingertips. Does it feel springy, or brittle and rough? I have found that the most dramatic rise is not always the most wearable choice.
Durability needs a real test. Stretch the cooled print gently across the grain, then inspect for cracks or separation at the edges. Wash a sample inside out according to the garment’s care instructions, and let it air-dry before checking again. Repeat for several cycles if the garment will see frequent wear. Look for flattened areas, fading, and changes in hand feel. Record what changed. One test can mislead, especially if curing or fabric tension was inconsistent.
Contact our team with questions, product inquiries or challenge us to engineer a solution for you.
Tel: +1 716 433 6764
Fax: +1 716 433 2850
Email: sale@ashymed.com
VanDeMark Chemical Inc.
One North Transit Road
Lockport, NY 14094 USA